- Latestly AI
- Posts
- How to Turn a Rough Idea into a Ready‐to‐Publish Campaign Using Design Pickle
How to Turn a Rough Idea into a Ready‐to‐Publish Campaign Using Design Pickle
Brief in minutes, review in hours, publish with confidence .
Who This Is For
If you’ve ever had a brilliant visual idea but no bandwidth to execute it fast, this tutorial is for you.
We’ll walk through how one simple creative request inside Design Pickle can turn a 5‑minute description into a fully designed ad campaign using a blend of structured briefs, human designers, and built‑in automation .
Step 1 – Start with Your Idea
Think of the idea in plain language. Example:
“A LinkedIn ad featuring a founder smiling beside our tagline ‘Human Work. AI Speed.’ in brand colors.”
That’s all you need. No wireframes, no complex notes.
Step 2 – Open the Design Pickle Dashboard
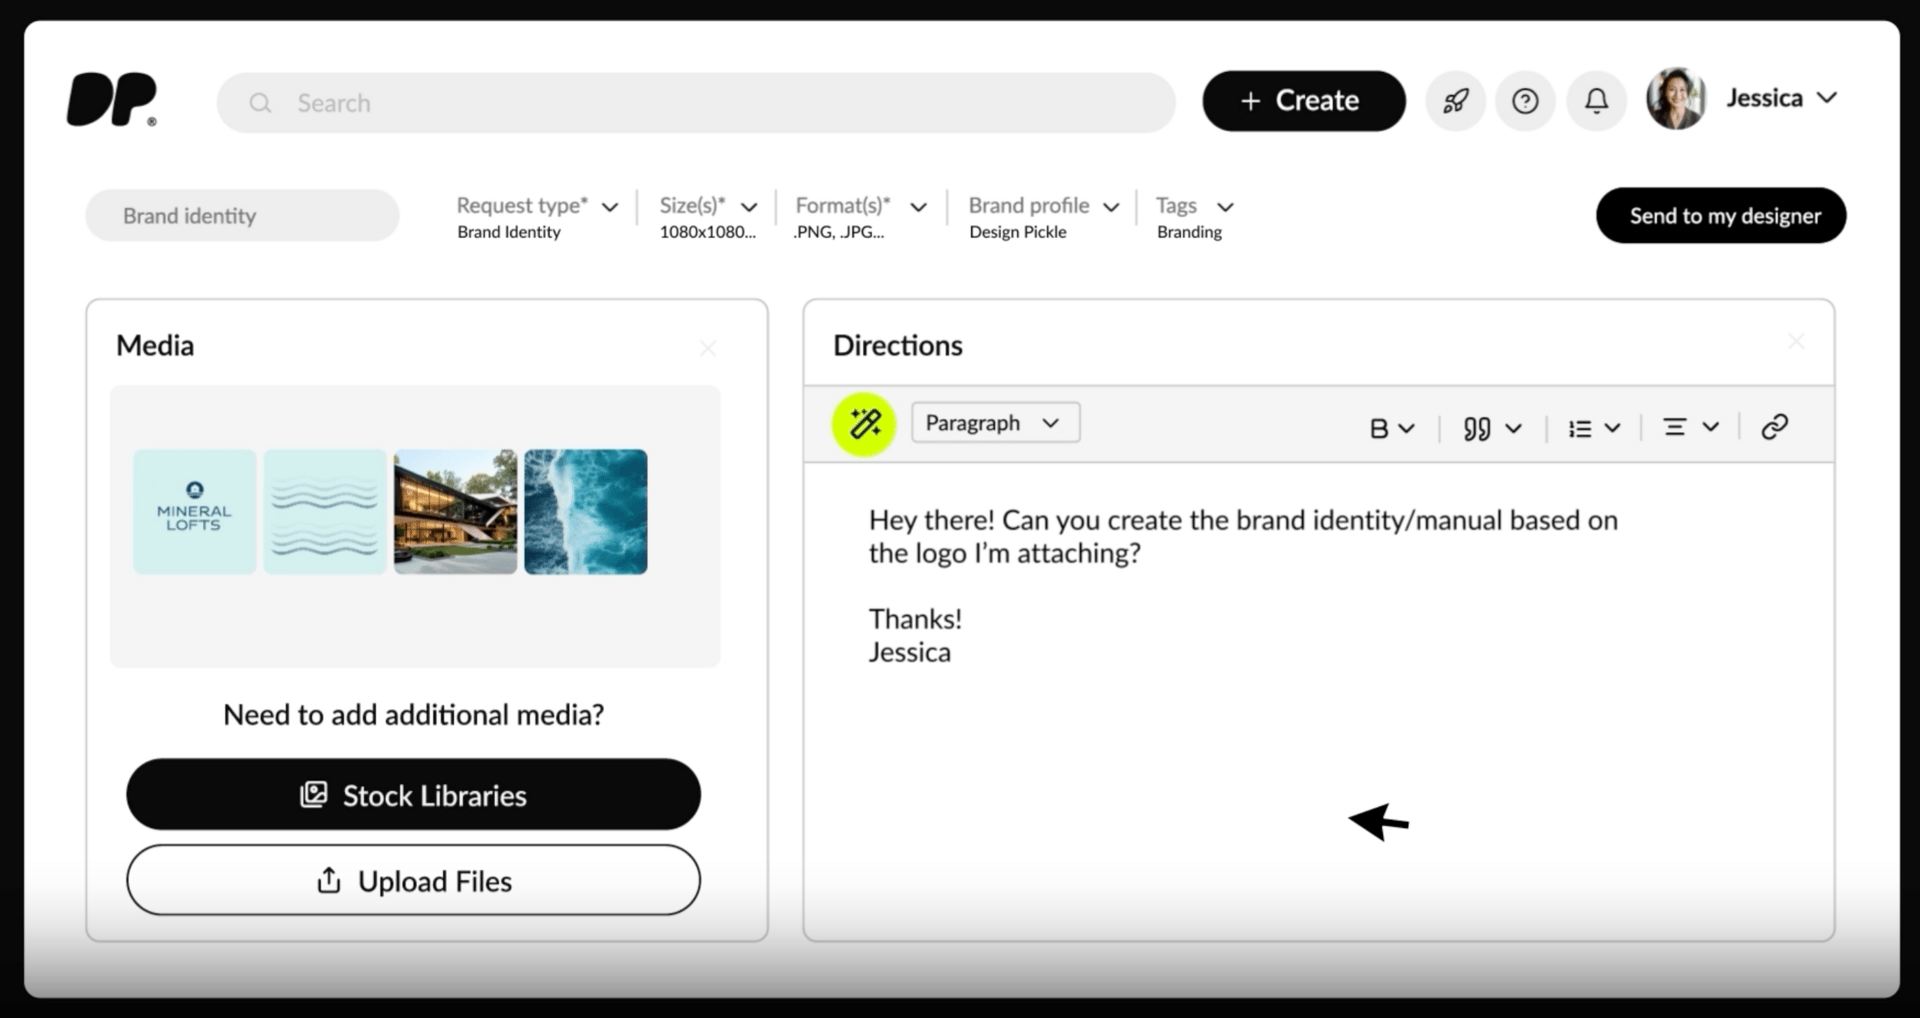
Log in and click Create → New Request.
Choose your delivery format — Social Graphic, Carousel Ad, or Video Clip.
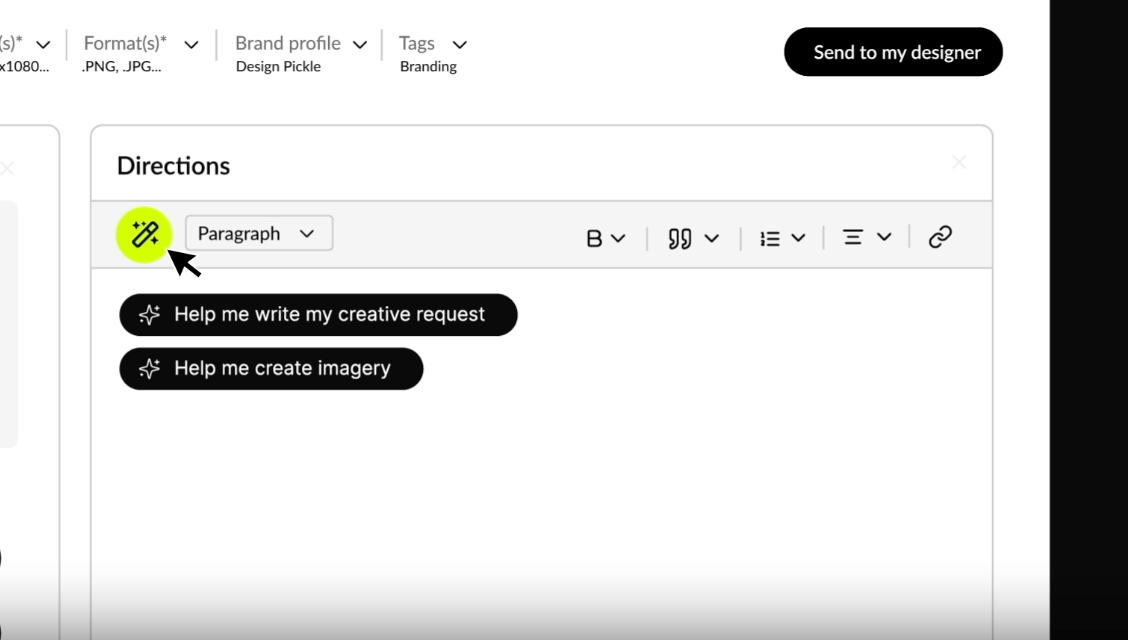
Under “Goal,” write your mini‑brief in human terms: what the audience should feel, what colors represent your brand, and any references to attach .
The AI Request Assist parses this and populates:
Correct dimensions (e.g., 1080×1080 for LinkedIn)
Preferred fonts/colors if they’re in your Brand Profile
A draft timeline estimate
Step 3 – Let the Platform Do the Routing
After submission, your task automatically routes to a vetted designer trained in your category — for example, SaaS ads versus consumer packaging .
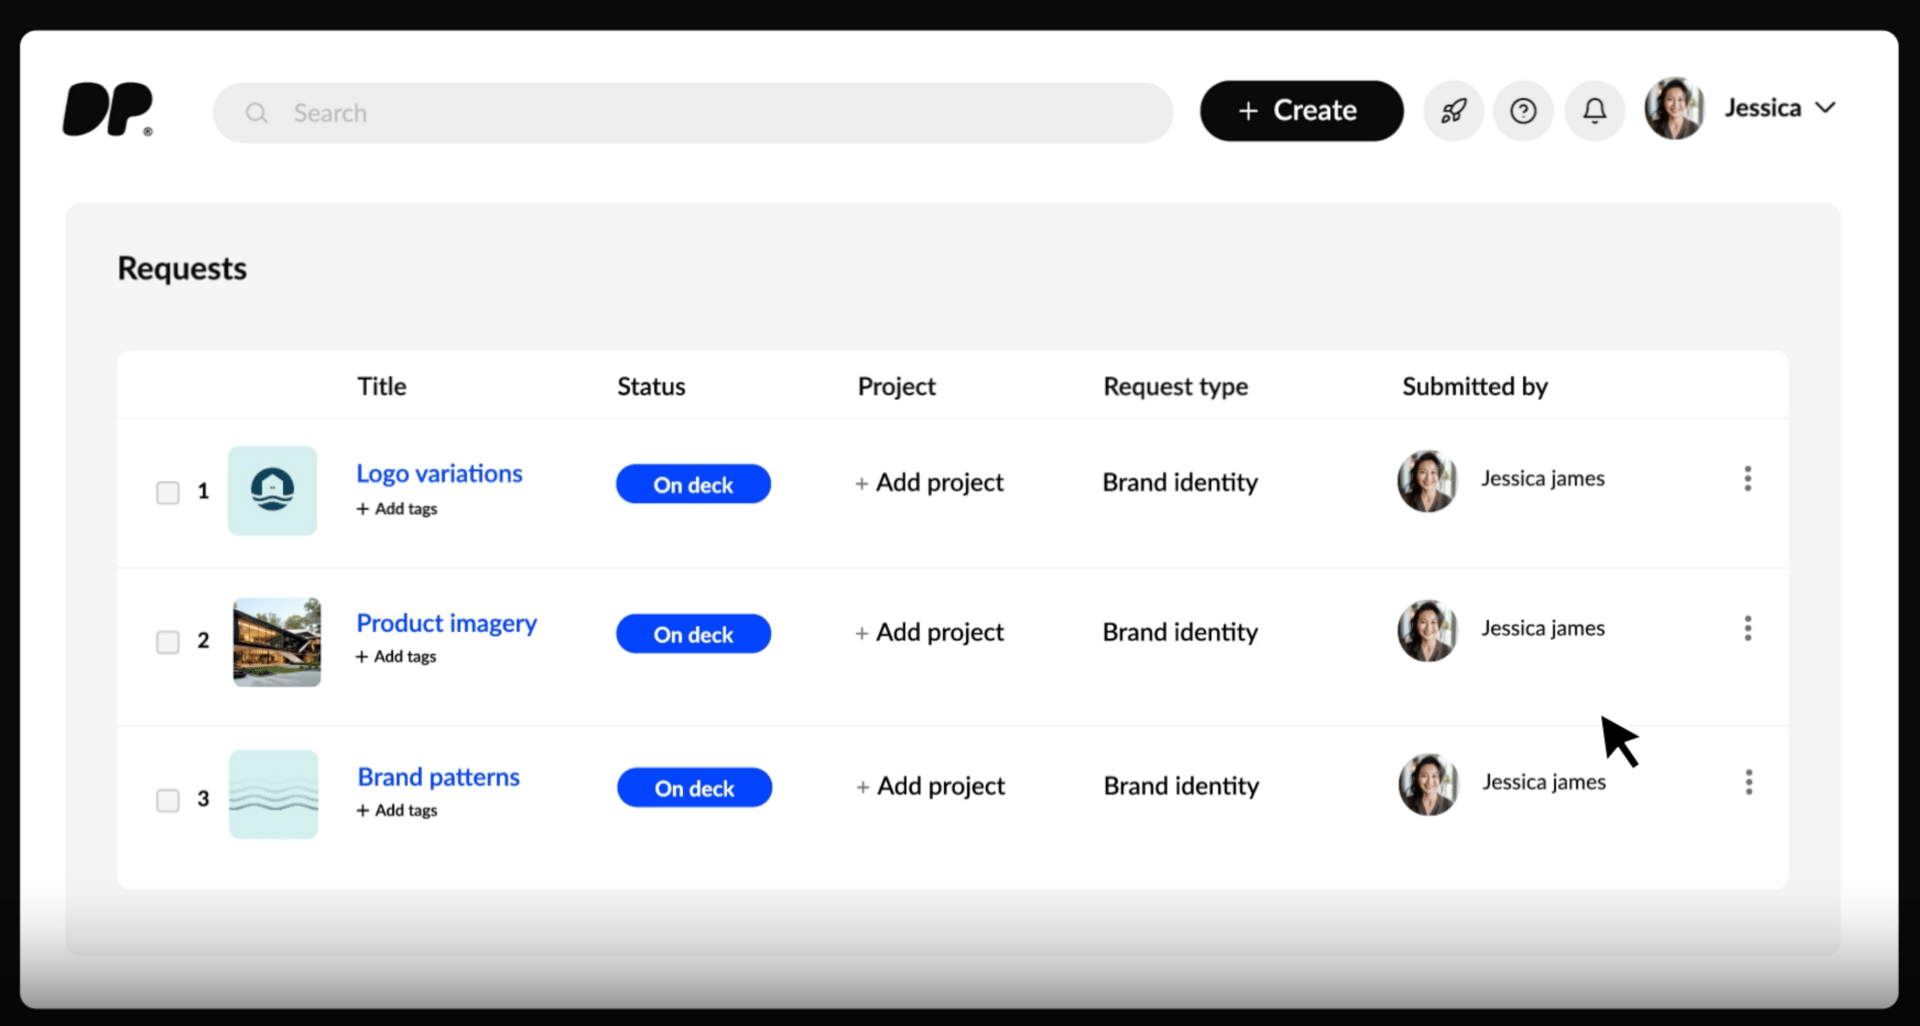
The first draft generally arrives within 24 hours. While you wait, your project panel shows its current stage: “Queued → In Design → QA → Ready for Review.”
What’s happening behind the scenes:
AI matching system aligns your brand rules with available skills.
Internal QA review flags anything off‑brand before you see it.
Slack or email notifications keep you updated .
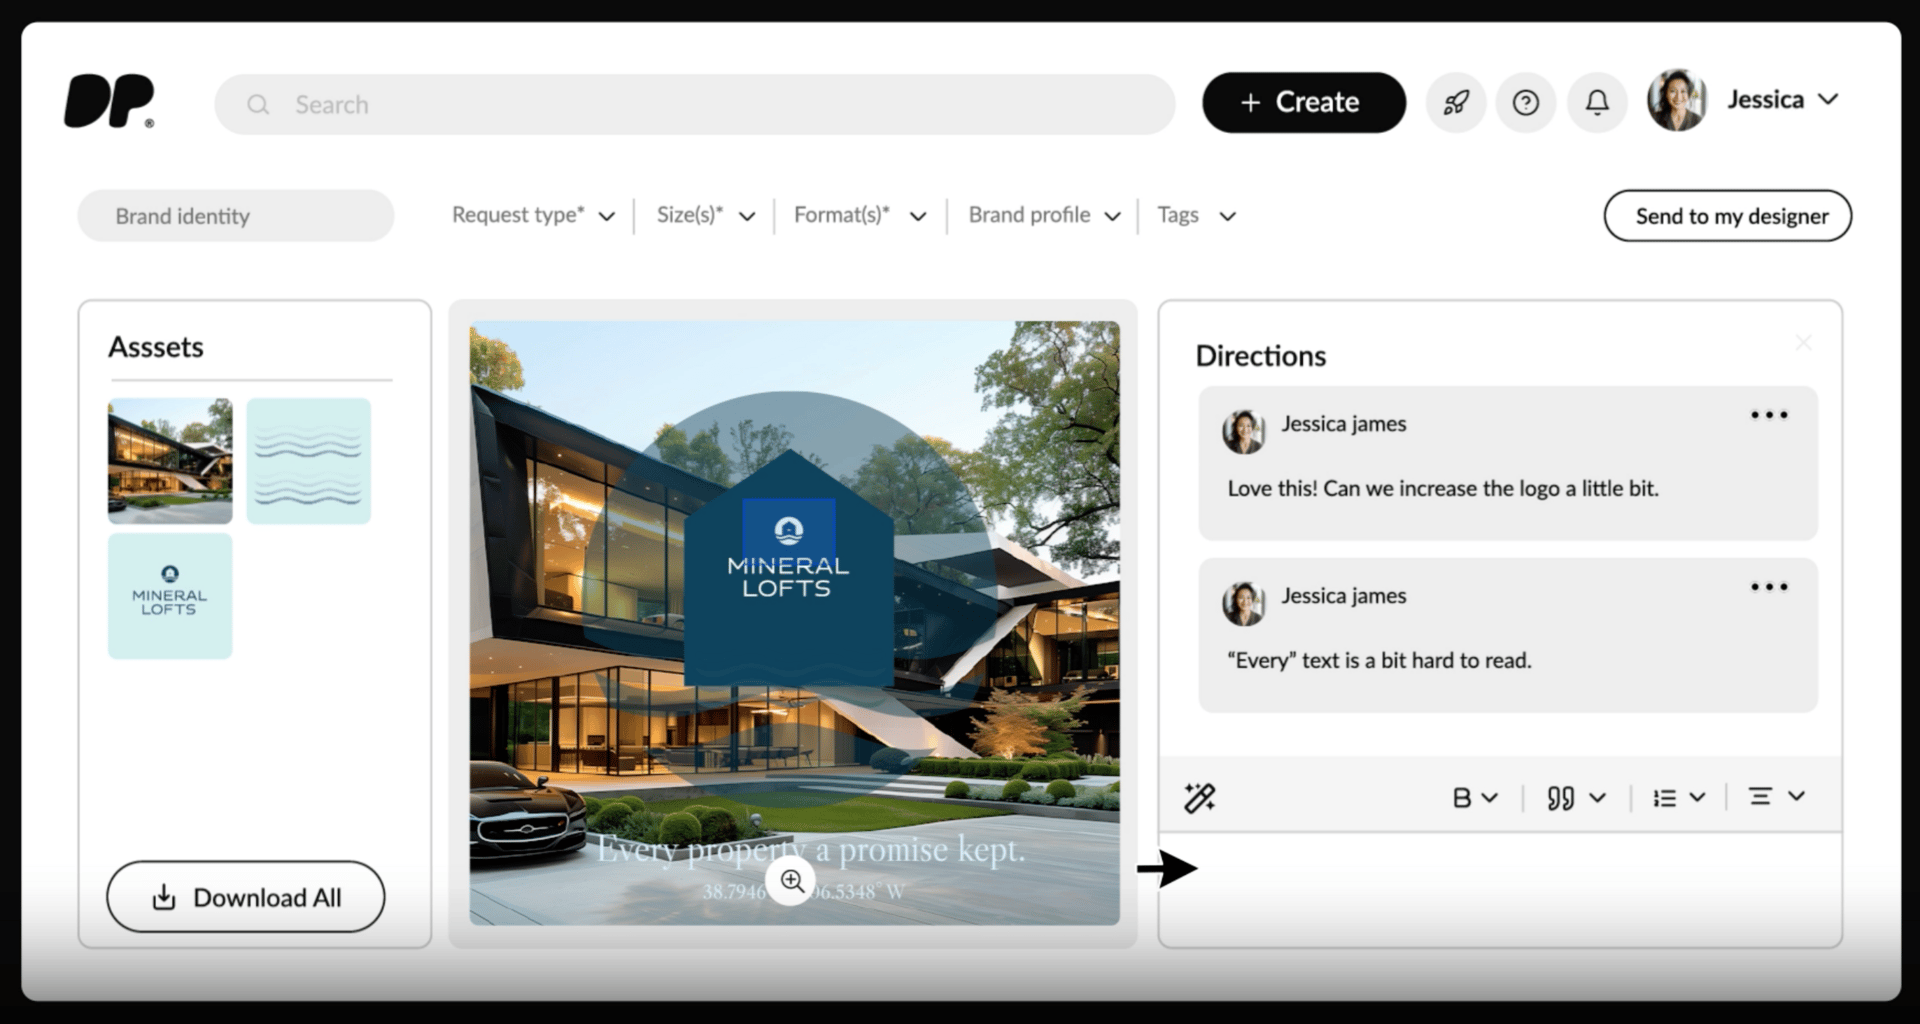
Step 4 – Review and Comment
When you get your file, click “Review.”
You can annotate directly on the design (draw, highlight, comment) — no PDF downloads needed.
Quick tips:
Be specific with color and layout notes (“Move logo 10 px right” works better than “Adjust branding”).
Use the “Approve” button only when you know it’s final; this auto‑syncs to Stockpress for archive.
Multiple stakeholders can comment simultaneously without overwriting each other’s feedback .
Step 5 – Automate Your Delivery
Once approved:
Files auto‑export to Stockpress DAM (if connected).
A link to the final folder arrives in Slack.
Analytics in your dashboard update — delivery time, revision count, on‑brand score .
From idea to publish‑ready asset: less than a work day.
Step 6 – Repurpose It (Optional)
Turn that ad graphic into a carousel or video reel on the same platform:
Just click “Duplicate → Change Format → Motion.”
The same designer or team handles adaptations without starting from zero .
Consistency stays; context changes.
Mini Demo Recap
Action | Tool Inside Design Pickle | Time Spent |
|---|---|---|
Create Request | AI Request Assist | 5 min |
Design Delivery | Dedicated Designer | 24 h |
Review + Feedback | In‑App Annotations | 10 min |
File Delivery | Slack + Stockpress Integration | Instant |
Total: ≈ 1 work day for a campaign‑ready file with no meetings.
Pro Tips for Better Results
Keep your Brand Profile updated — it’s how Design Pickle maintains visual accuracy.
Batch similar requests (e.g., all Q4 ads) to shorten total turnaround.
Revisit metrics in your dashboard monthly to identify what types of designs approve faster and perform best .
Key Takeaway
Design Pickle is at its best when used not for emergencies but for momentum.
Turn your design process into a daily habit: brief in minutes, review in hours, publish with confidence .